Farming with Cianna

Farming with Cianna

Thursday, July 28, 2016

Second Garden Update

Yay! I'm so excited to finally update you on our garden. Since last time, we have had a major dry spell and then finally a huge storm. The rain really did the garden good! Well, all but my poor tomato plants.


Sadly, two of our plants were broke in the storm. Each plant had around 15 tomatoes on them, which were still small and green (we saved a few from the broken limbs, hoping that they will ripen). The limbs we absolutely could not save, were fed to the animals (they loved it) and the ones that we could help have been retied and given support. Hopefully they will make it, but there's no tellin' what will happen.

Other than that, everything is doing GREAT!!!

Our cabbage leaves are getting huge! Hopefully in a couple weeks, they will be ready!

We have more than 25 watermelons starting on our 5 plants. This is the biggest that we have at the moment. It seemed to just appear over night! How exciting!

Our Marigolds are more beautiful than ever! All of our new seeds have sprouted and the sprouts in the containers are ready to go in the ground. I can't wait until the end of the season when they are all bigger!


Our snap peas are doing wonderful! Ever since we gave them the trellises to grow up, they have been doing great!

Lastly, our moldy pumpkin seeds have turned into this mess!

(We had poured a packet of wet, moldy pumpkin seeds in the corner of the garden, thinking they wouldn't grow.... They are doing the best out of our whole garden!!)

Update me on your garden! Comment below(:

Wednesday, July 27, 2016

Making an Emergency Car Kit

Hey y'all! As soon as I got my first car, my mom had me put a small container of supplies in the trunk that would help me in any situation!
I'm going to help you create your very own emergency car kit, to ensure you that you will be okay under any circumstances!

My mom and I sat down and created a list of items that I could possibly need if I were anywhere away from home.  We were thinking about every possible situation, so we may have gone a little bit overboard, but safety first, I guess.
Here's pictures and descriptions of everything I have included in my own emergency car kit!


Band-Aids of all sizes, Gauze sponges, Antiseptic wash, Antibiotic Ointment, Cleansing wipes, Hair ties, Bobby pins, and Safety Pins. 

Instant hot and cold packs.


Headache medicine for emergencies.


More Antibacterial wipes for messes.


Plenty of trash bags (if you're like me). I like my car clean(:


 A flash light in case you break down, or just need it at any time.


Of course snacks, bottled water, a plastic cup, and mini spoons and forks..Never know when you're going to get stuck in traffic, brake down, or just be plain out hungry!


 Of course you always need your hair brush, lotion, perfume, and hand sanitizer!


Along with deodorant and an extra toothbrush (toothpaste and floss, too!)


Oh yeah! Once again, PLENTY OF TRASH BAGS


A change purse with change.. You never know when you'll have to cross a toll booth or pay to park.


Of course, more smell goods! I always have a supply of air fresheners!


 An umbrella for the rain.


An ice scraper for the snow and ice (so cute!)


 A cute neck pillow for your passengers on long rides, or even you if you are sitting in your car for a long while. (Mine massages!)


WD-40 (I just love the tiny can!)


 Extra Oil, Antifreeze, Windshield Wiper Fluid, Brake Fluid, and Starting Fluid in case you run out unexpectedly or brake down.


 All of my supplies fit nicely in one small, convenient container.


It all fits nicely inside my dirty trunk next to my emergency fishing pole(:


Of course there are other items you should keep in your car that I did not list, such as:
  • Blanket (Mine matches my puppy neck pillow)
  • Sweatshirt
  • Socks (I keep regular and fuzzy socks just in case I break down in the Winter, or simply just need socks)
  • Change of clothes
  • Gloves, scarf, and hat (Winter)
  • Extra shoes
  • Other medications that may be important to you
  • Emergency money
  • Jumper cables
  • Tools to change tires, fix whatever, etc...
  • Phone Charger
  • Pen and Paper
  • Multi-tool or a knife
  •  Paper Map (just in case)

All of these items can easily fit in your car. Using a small container has helped me to fit supplies in my car, along with the console, glove box, and a bag that goes under your seats.
It is always better to be prepared because you never know what is going to happen. Safety first!

Tuesday, July 26, 2016

Citronella, Citronella, and More Citronella!


After being asked "what is that plant?" by many people, I've realized that a great number of people don't know what Citronella is.

Have you ever bought the outdoor citronella candles that repel mosquitoes? Many will be surprised to hear that those are made out of Citronella plants (Hints: the name)!


I bought my Citronella plants back in June, and they are probably one of my most favorite plants. They are super easy to take care of, they smell wonderful, and they keep all bugs off my porch! Can't get any better than that!
All I did was plant them in bigger pots and set them on each side of the porch. Mosquitoes HATE the smell, so they don't come around!
But it gets so much better than that..
There are tons of uses for Citronella, and it comes back every year!
Keep reading to find out all the amazing uses for this plant, as well as how to preserve it over the Winter months.

Harvesting Citronella 
Harvesting the leaves off the plant is not a hard job at all. Simply just pull the leaves off the stocks and they will regrow themselves. They respond well to pruning, so you don't have to worry about hurting the plant.


Preserving Harvested Leaves

Boiling Method- Bug Spray
Boil the leaves until scent is strong enough. Strain mixture. Use liquid as a bug spray to repel insects.

Slow Cooker Method- Citronella Oil
Blend Citronella leaves into a paste. Add Olive Oil and blend into a slow cooker and simmer for 5-8 hours. Strain and store in a easy-to-pour bottle or container.

Uses for Citronella Oil
You are going to be amazed at what Citronella can do around the house and for your body, beyond repelling pests!

Insect Repellent
As I mentioned before, Citronella is one of the most effective mosquito repellents you can find, but there is more! It can also prevent body lice, head lice, and flies.
Just apply every 30-60 minutes when outdoors.

Pet Control
This miracle plant can:
  • Calm barking dogs
Just wave a leaf by their nose so that they can pick up the smell. (It actually works for Brodie and Cooper!)
You could also use the spray or oil for this.
  • Keep dogs off the furniture
  • Keep bacteria, pests, and odor off the furniture and blankets.
Just spray down the areas in which you prefer!

Anti-Inflammatory and Pain Reducer
Citronella reduces swelling and increases blood flow, which helps with pain. It can also help with joint pain and arthritis!

Digestive Aid
Using the Citronella oil in your diet could do the following:
  • Detox body - increases sweating and urination to cleanse body from toxins
  • Prevent bacteria growth in digestive tract
  • Speeds up healing process
  • Can kill parasites and worms in the body
  • Protects against a number of diseases and infections
 Natural Skin Care
Applying a small amount of Citronella to your daily cleansing routine could help you:
  • Get rid of acne and dark spots
  • Fade sun spots
  • Fight warts, boils, and age spots
  • Heal dermatitis, eczema, and bug bite scars
  • Makes skin look more youthful
That sounds great to me!

Muscle Relaxant
This one's pretty self explanatory.
Rubbing the Citronella oil on painful areas can help to relieve cramps, swelling, and pain.

Natural Hair Care
Add the oil to your regular routine to get rid of dandruff and oils, and add volume!


 The great thing is, all of these requires little to no effort after the oil and spray are made! How convenient!
I have added Citronella to my daily life, and it has helped out so much! It is well worth your money!
Consider trying it!

 Until tomorrow!
 

Monday, July 25, 2016

Aftermath of the Storm

Good afternoon everyone! Hope you all had a great weekend.. It was definitely a nice one!
Well, after being trapped in the house while it was storming, I'm finally able to finish my post for the day.
I was walking up the stairs of my garage (which are outside) right after it had stopped, and wow! What a mess!
Here are a few pictures:


Nugget didn't make it inside in time.. He got a tad bit wet.

  This little one is enjoying playing in the puddles.
I think that's what I will name him...Puddles!

 Omelet here made it in right as it started pouring.. She still got wet. 

Mazy thinks she's a duck, so she stayed out with them.

 Chip and Dip ran away before the storm and never made it back until after, so they got really wet.

Momma did a great job of keeping her babies dry and warm as the wind was blowing like crazy.

 Soaked chickens!

 The bunnies only got a little wet, so they were happy, although the storm really scared them.

Pig is still screaming because he hates all the water....


 Sadly, our backyard is flooded once again, but we really needed the rain.
Our garden and ducks are happy now with all the water.

I hope you all stayed dry during the storm!
Until tomorrow!

Friday, July 22, 2016

All Things Herbal


Herbs, by definition, are any plant that is used for food, flavoring, perfumes or medicine.
Here at the farm, we use a variety of herbs to do a majority of different things.
These plants are completely organic, mentioning the fact that we grow them with NO CHEMICALS, and they are completely ANIMAL FRIENDLY.


Drying Fresh Herbs
Hang your fresh herbs to dry in order to preserve them or make teas.
Another drying method is rolling them in newspaper and letting them sit until dry.
Drying your own herbs is easy and will save you money!

Freezing Fresh Herbs
If your house is anything like mine, you already have a ton of dried herbs and spices in your cabinets in which you use everyday.
Change it up a bit by freezing your herbs in ice trays with olive oil.
This is will preserve them and make cooking dinner easier on you!
Just throw a cube in the skillet and instantly have oil and spices!
How convenient!
You could include rosemary, cilantro, parsley, bay leaves...anything really!
Of course we use herbs in the kitchen when preparing our own meals, but how else can they be used?
Hair Rinse
This herbal hair rinse makes your hair super soft and shiny! Replace your shampoo with it at least three times per week.
Ingredients:
  • Water (4 cups)
  • Dried lavender (1/2 cup)
  • Dried Rosemary (1/2 cup)
  • Apple cider vinegar (3 tbsp.)
Utensils:
  • Pitcher
  • Pot
  • Strainer
Instructions:
  1. Boil the water
  2. Turn off heat and add dried spices. Let the water cool. (The longer the herbs are in the water, the more intense the smell is.
  3. Strain.
  4. Pour solution, without herbs, into pitcher and use as shampoo. (I like to pour it on my hair over a bowl so that I can reuse it multiple times.)
What a great way to make your hair healthy without chemicals!

Herbal Washes, Scrubs, and Soaps
By now, you should already know that I fully support the whole organic, natural ways stuff. Knowing this, you shouldn't be surprised that I make my own washes and scrubs.
I use my very own blueberry lemonade scrub as face wash (the acidity of the lemons help with blemishes and oily skin and the blueberries give it a great smell) every morning and I have many different kinds of soap:
  • Almond
  • Blueberry lemonade
  • Coconut
  • Cupcake
  • Eucalyptus
  • Green tea
  • Peppermint
  • Vanilla
All including herbs to not only preserve, but to benefit your skin.

Mason Jars are $10 per jar.

There are plenty more ways to use herbs indoors, but lets move outdoors!
Herbs are very handy when you are dealing with animals. From feeding to cleaning, herbs help with everything!

Coop Freshener

Sprinkle the following herbs around the chicken coop and the run.
  • Lavender (Insecticide, strong aroma, stress reliever.)
  • Mint (Rodent and insect repellent, disease prevention, parasite control.)
  • Oregano (Antifungal, antibiotic.)
  • Spearmint (Antiseptic, eases nerves.)
  • Yarrow (Antibacterial, anti-inflammatory, stress reliever.)
Sprinkle the following in the nesting boxes to keep them smelling great and clean!
  • Lemongrass (Insecticide.)
  • Marjoram (Laying Stimulant.)
  • Mint (")
  • Nasturtium (Laying Stimulant, antibiotic, antiseptic.)
  • Nettles (Laying Stimulant, health booster.)
  • Parsley (Laying stimulant, feather growth.)
  • Spearmint (")

In addition to sprinkling fresh plants in the chicken coop and run, I make my own herbal air freshener.
Ingredients:
  • Water
  • Vinegar
  • Peppermint oil
  • Eucalyptus oil
  • Fresh mint
  • Fresh oregano
Add all ingredients in a spray bottle until you get your preferred scent. I made mine super strong to make sure it lasted a while. It smells nice and fresh!
I spray it on the walls of my buildings 1-2 times a day and the wood soaks it right up. Each time I walk in, it smells better and better.
Animal Food
Pretty much all herbs are good for the animals to eat, but here are some I highly recommend adding in to their feed!
  • Basil
  • Bee Balm
  • Cilantro
  • Comfrey
  • Dandelion
  • Marjoram
  • Nasturtium
  • Nettles
  • Oregano
  • Parsley
  • Sage
  • Spearmint
  • Tarragon
  • Thyme
Chick Feed

    • Basil
    • Bay Leaves
    • Chervil
    • Cilantro
    • Comfrey
    • Coriander
    • Dandelion
    • Dill
    • Fennel
    • Marjoram
    • Mint
    • Nettles
    • Parsley
    • Spearmint


Chicken/Duck Water
Adding herbs to your animals water could be very beneficial!
  • Basil (Antibacterial, rejuvenating.)
  • Dandelion (High in antioxidants, make yellow yolks.)
  • Oregano (Antifungal, antibiotic.)
  • Parsley (Laying stimulant, feather growth.)


Chicken Dust Baths
People add herbs to their animals' sand and dust baths for a number of reasons...

  • Anise ( Parasite control.)
  • Fennel (Disease prevention, parasite control.)
  • Ginger (Parasite control, stress reliever.)
  • Lavender (Aromatic, insecticide.)
  • Yarrow (Antibacterial, Stress reliever.)


This is exactly why I believe the natural way is the best way. There is so much you can do with fresh plants and it saves you money. There is no need to worry about animals getting sick from it, because it's good for them!
Once again, these are some things I highly recommend doing with your herbs!
I am selling scrubs, washes, and soaps, and hope to be selling bath bombs, bath jellies, and bath salts very soon!
Come back for our next post here on Farming with Cianna!

Thursday, July 21, 2016

Homemade Chicken Treats


Hey there, again!
Today sure was a hot one! All the animals were showing it today as they laid around, waiting for the sun to fall. What better way to cool down the flock than some homemade treats!
I am going to share with you some treats for our feathered friends that they are sure to love!


 Hot day, cold treats
Chickens have a hard time cooling themselves in the Summer, so I highly recommend providing cooling options for them.
You can set up sand or dust baths for them to roll around in, but I believe their favorite cooling technique is, of course, eating cool foods!
Freeze their favorite foods in a bowl of water, or even ice trays for smaller flocks, to satisfy their needs!
Here are some of my chickens' favorites.
Fruit Cubes

Chickens sure do love fruit, so why not treat them with it! (It's super easy!)
Add cubes of fruit to water, freeze until solid, and serve.
Some good fruits for chickens include:
Strawberries
Blueberries
Blackberries
Raspberries
Cherries
Apples
etc..
Just make sure to stay clear of any citrus fruits; oranges, lemons, limes, .. are very high in acid, making them toxic to chickens. Also, no moldy foods!


Vegie Cubes

Vegetables are also loved by chickens. 
I added corn, lima beans, peas, lettuce, carrots, and radishes to mine.
Leafy greens are great for them, as well are cauliflower and broccoli. Stay clear of raw potatoes, onions, and garlic (in large doses.)
Now I say that, but garlic is actually good for them a tiny bit at a time.
I sprinkled about a tablespoon of garlic powder in the vegie cube to provide a natural anthelmintic.
I wouldn't give them more than 3 tablespoons of garlic a month. 
Once again, don't give your animals moldy foods!


Fresh Cubes
Herbal ice cubes are also a good way to satisfy your chickens.
I like to use mint for my ice blocks, but any herb is good.
Same steps as the others, just add it to water and freeze.
What a clean, fresh way to cool down!


Great thing about these cool treats are, all the animals love them! The chickens peck at them to get the ice and food, the ducks eat the fresh foods after the ice melts, and of course Peppa enjoys it all.  I started using Tupperware containers to make these treats after the first time I made them with ice trays (Peppa ended up eating them whole, so none of the other animals got any.)
Either way, they are great for hot days!

 Hot or Cold Day Treats

Hanging Treats
 A mixture of oats, chia seeds, sunflower seeds, and lentils is a great GMO-free way to treat your chickens in a different way.
You can serve it to them like you do their normal food, or even make hanging treats.

To make hanging treats, you will need oats, sunflower seeds, chia seeds, lentils, peanut butter, string, scissors, and a toilet paper or paper towel roll
The steps are super easy!
Cut a small hole in the paper towel roll to fit a piece of string through. Cut the string as long as you prefer and knot it after putting in through the hole.
Mix the ingredients, spread peanut butter on the toilet paper roll, and roll it in the ingredients. The mixture will stick to the peanut butter.
Hang the feeder in the coop and watch them go for it!


If you wanted, you could even go as far as making whole treats by mixing all the ingredients, including the peanut butter together and shaping them with cookie cutters. After they have dried, you can put a string through and hang it up for the chickies!

More things you could hang for treats are heads of lettuce, broccoli, cauliflower, and other vegies.


Herbs

Basil, Bee Balm, Cilantro, Comfrey, Dandelion, Dill, Marjoram, Mints, Nettles, Oregano, Parsley, Sage, Spearmint, Tarragon, and Thyme are all great herbs for chicken's health.
Pick some fresh plants and hang them in your chicken coop. They love having different things to peck at!
I love using herbs around the farm for EVERYTHING!
Speaking of which, my next post is going to be everything herbs!

Come back later to read about all the great uses for herbs!

Until tomorrow!


First Garden Follow Up


Good afternoon, friends! Thanks for coming back to Farming with Cianna!
Yesterday, I published my gardening post revealing some great tips on garden care. Well, today, I have to make some corrections.
 
Yesterday evening, Brodie and I were walking down the sidewalk to go to the backyard. At the end of the sidewalk, there is a large flower garden. As I called for Brodie to follow me, I realized he wasn't coming because something was in the flower bed.
I walked over only to find Peppa munching on some leaves.
 
At this point, I was thinking this is impossible; he has to be magic or something. We have blocked all the places that he gets out under the fence and all the gates were closed. How does this happen!!!
 
I walked the fence, searching for a new opening in which pig could fit. I saw nothing.
Luckily, my little cousins had watched the whole thing! (Thank goodness for them.)
They showed me to the hole and I quickly got it fixed. We safely got Piggers back in the fence by trapping him in the garage and leading him with food.
I thought we saw all the damage he had done, in the flower beds, but I was wrong.
This morning, just like every other morning, I walked out to observe the garden. My routine consists of checking all the plants to make sure they haven't been destroyed, helping the vines interweave through the trellises, and pulling weeds.
My morning garden check was ruined the moment I saw this:


My lettuce had been trampled and eaten by Peppa, along with some onions, radish leaves, and green pepper leaves! (Hints the hoof prints throughout my garden.) 
 
(A picture of the lettuce from yesterday)
 
So, I had taken the time to recommend some organic ways to keep pests out of your garden in my last post. I am now letting you know cayenne pepper, chili powder, and garlic powder DO NOT phase pigs!!
Trying to find a way to end this, I Googled "How to keep pigs out of the garden." Surprisingly, it had already been searched before (which was really funny to me for some reason.)
Pretty much all they had to say was put up a fence. I guess that's all you can do when it comes to hungry animals.
Although Peppa shouldn't be able to get out anymore, I am still planning on finding something he doesn't like to spread on my garden, just to be safe.
When I find that item, I'll let you know!

Hope Piggers at least made you smile today!
Check back for healthy, organic chicken treats later tonight!
Much love for all my readers!


Wednesday, July 20, 2016

Gardening 101 (From Dummies)


Welcome to the first official non-introduction post here at Farming With Cianna!

Dan and I are looking forward to giving you a few gardening tips that we have learned this Summer with our own garden.
Instead of "Gardening for Dummies", we have decided to name it "Gardening from Dummies", given that we are first year "farmers"!

This has been our first year having a garden WITHOUT mom's help. We did everything completely on our own, including starting the plants from seeds (with few exceptions).
We have a wide variety of plants in our garden; all were started in late March (I wish we would have started them earlier).


We have the following plants:
  • Strawberries
  • Watermelon
  • Cantaloupe
  • Jack-o-Lantern Pumpkins
  • Jack-be-Little Pumpkins
  • Cucumbers
  • Snap Peas
  • Lima Beans
  • Tomatoes
  • Zucchini
  • Hungarian Wax Peppers
  • Green Peppers
  • Onions
  •  Radishes
  • Beets
  • Cabbage
  • A Variety of Lettuce
  • Kale
  • Spinach
  • Celery
  • Stevia
  • Citronella
  • Wild Mint
  • Spearmint
  • Sunflowers
  • A Variety of Marigolds
  • White Daisies


So far, we have gotten many radishes (most of which were fed the animals), a TON of mint, a few strawberries (even though they weren't supposed to bloom this year), a gallon of the hot peppers, we have about 100 onions almost big enough, and we've gotten around 2 gallons of lettuce (a lot has been fed to the animals). Our Sunflowers are doing great, along with the Marigolds (we're growing them for chicken food).


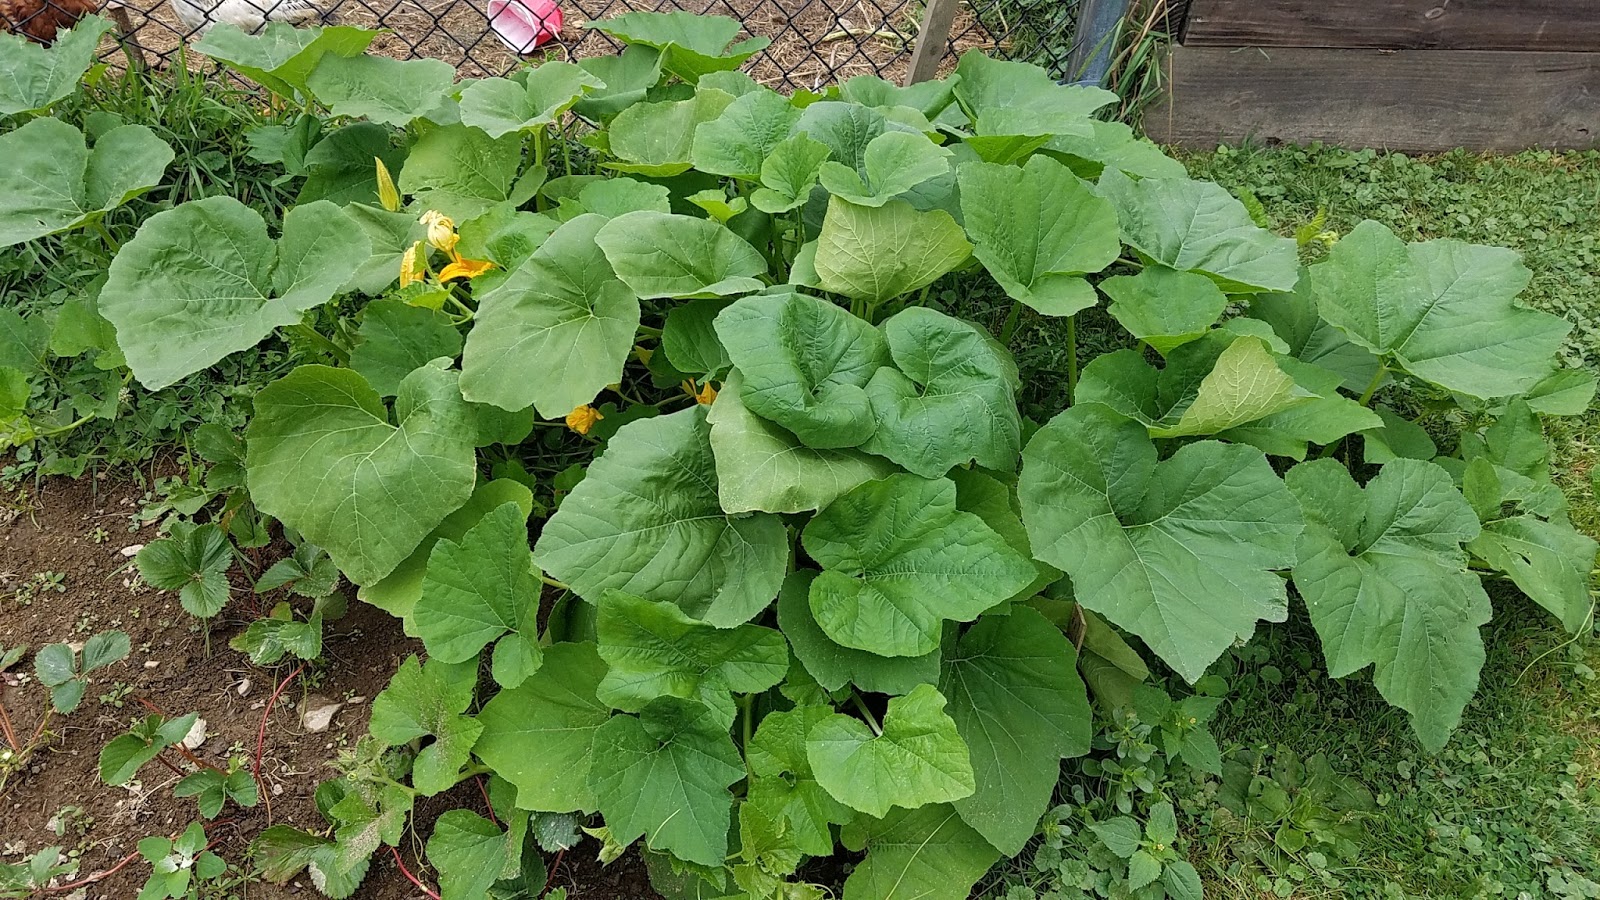
Our Watermelons, Pumpkins, and Cucumbers are finally starting to grow up the trellises and even have little starts on them...


And our Tomatoes are getting huge! (The picture definitely doesn't do them justice.)
We have around 50 small green tomatoes at the moment!
We can't wait to make our own spaghetti sauce!


 So what are some things we did that got us to this point? Well there are plenty of great tips for us to share with you!

  1. Replant foods that can be replanted!
How many times have you gone out and bought a pack of celery or heads of lettuce this Summer?
We've only bought them once because we replanted the bottoms!


The steps for this is as easy as cut the bottom off the celery or romaine lettuce, plant in dirt, and water!
It only take two-five days to start regrowing itself after planted!

Both the celery and romaine lettuce grow back quickly, and fully. The lettuce head don't grow back to look like the originally did, but it produced the same tasting lettuce.


This is a great way to save money and grow more!

     2.   Try growing in containers or raised boxes!

We don't have raised boxes this year, but everyone that we know who does have them, loves them. (Hopefully next year we will get to build a couple.)
Since we don't have the gardening boxes, we planted certain plants in containers and pots.
Of course they all were started in plastic boxes like these (right), but many plants get too big to grow up in them.
We have some lettuce, celery, onions, stevia, citronella, and some flowers planted in pots. Everything that we have planted in the pots has sprouted and grown really quick.
We have them our on our deck, so it's hard to forget to water them since we see them every time we walk out.
You don't have to worry about weeds taking over and you can place them anywhere that gets sun. (they can be right at your fingertips like ours!)


     3.   Fertilize, Fertilize, Fertilize!
Though not everyone fertilizes their gardens, I have had a great outcome from using organic fertilizer.
We use a mix of chicken and goat manure, and the duck's pool water! People use all different kinds of things to boost their gardens, all of which work great, such as:
  • Animal poop (chicken, duck, goat, cow, etc...)
  • Wood ashes
  • Compost (decomposed fruits, vegies, eggshells, coffee grounds, etc...)
  • Blood meal and other animal products
  • and finally, my favorite of all...EPSOM SALTS!!!
I just recently started sprinkling Epsom salts on my garden after reading a great article about its' benefits. (http://garden.org/learn/articles/view/68/)
After sprinkling a tiny bit on each plant and watering to let the soil absorb the nutrients, my garden thrived tremendously!
My one zucchini plant wasn't looking too hot. It's leaves were yellowish and it wasn't growing. After putting the Epsom salts on it, this is what happened:


I still can't believe how much it has improved since last week.
Epsom salts are one of the easiest ways to fertilize. Instead of shoveling manure, turning a heavy barrel of compost, or even carrying the bag of store-bought fertilizer, all you have to do is buy the small container of salts, and sprinkle about a tablespoon on each plant every two weeks. No hassle, no pain - just gain!
This is one of the smartest things I have done this year and it's probably about my #1 tip for you today. Try it!
     4.  Keep your garden weed and pest free!
I don't know about you, but I like to keep my garden completely organic and chemical free. This gets pretty hard to do when you have weeds taking over and pesky animals trying to steal food.
          Weeds
I was scrolling through Pintrest one day and stumbled upon a great gardening tip that I have used ever since. 
Homemade weed killer!
 Of course it's not 100% chemical free, but it is the best one that I have come upon.
You mix vinegar, dish liquid, salt, and water in a spray bottle and spray the weeds in full sun.
The mix should kill the weeds by the next day and then you can easily remove them.
Note that it may not kill the larger stuff (I've learned the hard way), but it should kill all the smaller weeds in your garden.
There are different variations of the recipe to try listed in this website: http://www.garden-counselor-lawn-care.com/vinegar-weed-killer.html
They are all great!
I highly recommend this safe alternative.
          Pests

It's always devastating walking out to see a half eaten garden (it's happened to me more than once this year.. All but one time because of my own rabbit who can escape without a trace.)
A fence would be helpful, but it's a big hassle, so I've found a way to keep bugs and animals, like rabbits, from eating up your plants. Again, organic ways are the safest ways!
Cayenne pepper scares away most predators because of it's spicy smell. No animal wants to eat hot stuff!
It's completely organic and works for deer, rabbits, and other animals that happen to be sniffin' around.  
Likewise, chili pepper and pure black pepper work the same way.
Garlic powder and onion powder have seemed to work for me when dealing with bugs.
I usually mix garlic powder, chili powder, and cayenne pepper when I sprinkle my plants.


To make a spray for your plants, blend 10 cloves of garlic and a tablespoon of cayenne pepper with one quart of water. After letting it sit for at least 24 hours, strain the mixture through cheesecloth and add a cup of cooking oil. When ready to use, add 1/2 cup of water to the concentrated mixture.


These are just a few safe ways to keep the pests out of your garden.
A big thanks to people on Pintrest for helping me find these awesome alternatives!


  5.   Save your seeds!
I know not everyone enjoys starting their plants from seeds, but it is a cheaper route to take when planting a garden.
I have already began saving seeds from this year, just to get a head start.
I collect the seeds from any fruit or vegie that I can do so.
So far, I have green pepper, hot pepper, marigold, and sunflower seeds dried and ready to be planted.
 I then let them dry out on a paper towel. I use plastic ziplock baggies to store my seeds in so that I can easily label them. You can use whatever you please. 

I started my seeds in late March, which was not early enough compared to everyone else's plant sizes. We stored them in a vehicle that wasn't being used to provide a "greenhouse". They got plenty of heat and light being outdoors, so we made sure to keep them well watered.
Hopefully, we can make a greenhouse for this coming year.

I recommend starting all your seeds, even though some packages say not to start them before the enter the ground.  All of ours did well.
Doing this will save you money for years to come!
Hopefully we gave you some helpful tips for gardening. I plan to do a follow up post on the garden soon.
Thanks so much for reading!


Update me on your garden and tips you have for me below, in the comments!